Phoenix Jailbreak
Phoenix Jailbreak is a semi-untethered jailbreak for iOS 9.3.5, iOS 9.3.6 for iPhone 5, iPhone 5C, iPhone 4S.
We have listed all Phoenix working methods on this page. Select the preferred phoenix Jailbreak download method with the guides from the following categories.

Phoenix Windows Jailbreak download + Guide
Phoenix Mac Jailbreak download + Guide
Phoenix Linux Jailbreak download + Guide
Phoenix Jailbreak alternatives for latest iOS versions
If you have any compatible device for the latest iOS versions, it is recommended to upgrade to the latest iOS 17 versions and use the latest Jailbreak tools from the iOS 18 Jailbreak (beta), iOS 17.6 Jailbreak (beta), iOS 17.5/iOS 17.5.1 Jailbreak, iOS 17.4/iOS 17.4.1 Jailbreak, iOS 17.3/iOS 17.3.1 Jailbreak, iOS 17.2 / iOS 17.2.1 Jailbreak, iOS 17.1 – iOS 17.1.2 Jailbreak and iOS 17 – iOS 17.0.3 Jailbreak pages.
Phoenix Online Jailbreak
Online method is the easiest method to download Phoenix jailbreak. It does not require a computer. You can install no pc ( PC free ) Phoenix Online IPA from the following button.
Step guide for Phoenix Online method
Step 01 – Tap the above button to install Phoenix Online IPA. Make sure to visit this page from Safari Browser.
Step 02 – Trust the installed Phoenix app with Go to Settings > General > Profile > Trust ehe Phoenix app.
Step 03 – Run the Phoenix JB app from your homescreen.
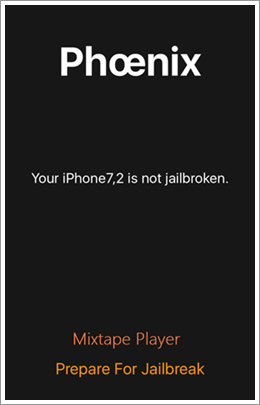
Step 04 – Tap on the “Prepare For Jailbreak”–> “Accept” → “Proceed With jailbreak”—->
“Begin Installation” to start the Jailbreak process.

Step 05 – Finally, the Cydia icon will be available on your homescreen.
Phoenix Compatibility : iOS 9.3.5 or iOS 9.3.6 running iPhone 4s, iPhone 5, iPhone 5c, iPod touch 5G, iPad mini, iPad 2, iPad 3rd gen, iPad 4th gen.
How to jailbreak with Phoenix (Windows/Mac/Linux)
Step 01 – Download the Phoenix IPA and the Cydia impactor tool using the following buttons. Download the Cydia Impactor tool according to your Computer OS.
Note – Cydia impactor works with paid Apple Developer accounts only.
Step 02 – Connect your device to the Windows / Mac / Linux computer.
Step 03 – Open Cydia Impactor tool.
Step 04 – Drag and drop the Phoenix IPA file onto Cydia Impactor.

Step 05 – Enter your Apple ID and password sent to Apple to sign the IPA file. Then Cydia Impactor started installing the jailbreak app.
Step 06 – Now Phoenix Jailbreak app installed to your device.
Step 07 – Now verify the Phoenix Jailbreak app you have to trust the profile.
Go to Settings — > General — > Device Management — > Phoenix Jailbreak — > Verify — > Trust.
Step 08 – Now go back to the Home screen and open the Phoenix app.
Step 09 – Click on the “Prepare For Jailbreak” button to start the jailbreak.
Step 10 – Click on “Accept” and Dismiss the “Free Mixtape Available” popup message to avoid installing unwanted apps.
Step 11 – Click on “Proceed With jailbreak”—-> “Begin Installation”—->Use provided Offsets.

Step 12 – Now the jailbreak process begins and this process takes some time. “Storage Almost Full” message might pop up when installing Cydia. Click on “Done.”
Step 13 – Once jailbreak completes your device will reboot. Finally, the Cydia icon should appear on your homescreen.

Note : If Cydia is not there, repeat the above Jailbreak process until it works.
Phoenix jailbreak alternative for latest iOS versions
Sileem – Sileem is a brand new jailbreak repo extractor for latest iOS 16 onward. It is the best Phoenix jailbreak alternative. You can install many iOS 16 – iOS 17.6 related jailbreak apps, tweaks, system tweaks and more.
Refer more from iOS 16.7 – iOS 16.7.8 Jailbreak, iOS 16.6 / iOS 16.6.1 Jailbreak, iOS 16.5 / iOS 16.5.1 Jailbreak, iOS 16.4 / iOS 16.4.1 Jailbreak, iOS 16.3 / iOS 16.3.1 Jailbreak, iOS 16.2 Jailbreak, iOS 16.1 – iOS 16.1.2 Jailbreak and iOS 16 – iOS 16.0.3 Jailbreak pages.
Zeon – Zeon is the best Phoenix Jailbreak alternative. It is perfectly compatible for iOS 14 to iOS 17.5.1 users to install jailbreak apps, tweaks, themes and many more customization apps. Zeon Jailbreak repo extractor is the popular feature of Zeon. It uses an easy repo extraction online method to install jailbreak apps. So, we can recommend Zeon jailbreak repo extractor as the best Phoenix jailbreak alternative for these latest versions.
Refer more about zeon from the iOS 15.8-iOS 15.8.2 Jailbreak, iOS 15.7 – iOS 15.7.9 Jailbreak, iOS 15.6 / iOS 15.6.1 Jailbreak, iOS 15.5 Jailbreak, iOS 15.4 / iOS 15.4.1 Jailbreak, iOS 15.3 / iOS 15.3.1 Jailbreak, iOS 15.2 / iOS 15.2.1 Jailbreak, iOS 15.1 / iOS 15.1.1 Jailbreak and iOS 15 – iOS 15.0.2 Jailbreak pages.
Zylon – Zylon is a third party app store with many more jailbreak features. Because it is not compatible with Phoenix Jailbreak for latest iOS versions, Zylon can be recommended as Phoenix jailbreak alternative. Download and install jailbreak apps online through Zylon.
Hexxa Plus – We can consider Hexxa Plus jailbreak repo extractor as a Phoenix Jailbreak alternative. All the iOS 14 to iOS 17.4 users can install many jailbreak related apps and tweaks online from Hexxa Plus repo extractor.
zJailbreak – zJailbreak is another popular alternative for Phoenix. It is compatible with all 32-bit & 64-bit devices. It consists of many Jailbreak tweaks, Apps Themes and many more. Download from the below button.
JailbreakMe – This is another Jailbreak for iOS 9.3.5 & iOS 9.3.6. It will install Cydia automatically once the jailbreak process completes. You can use Phoenixpwn alternative. Get more information and download links from JailbreakMe page.
Phoenix jailbreak offsets
You need to manually specify offsets for iOS 9.3.5 & iOS 9.3.6. Phoenix v3.0 update fixes custom offsets to avoid facing issues.
Change Log
22/03/2021 – v6 update added following changes.
- Revamped bootstrap installation to use libarchive instead of GNU tar.
- Inlined /bin/launchctl into the Phoenix binary to prevent code signing issues from sideloading.
23/07/2019 – v5 update Ships with offsets for 9.3.6 now.
07 /10/2017 – v4 update fixes the following.
Adds the option to force a complete reinstall by holding down on “Kickstart Jailbreak”
Fixes two crashes when contacting phoenixpwn.com for offsets if there is an SSL error or a status code of 200 is returned, but the response body is empty.
08/08/2017 – v3 update fixes custom offsets
07/08/2017 – v2 update release to fix following issues.
Removes problematic binaries that resulted in multiple scripts breaking.
LaunchDaemons not starting after re-jailbreaking.
Mixtape Player where lyrics did not display correctly using Dark Mode.
Mixtape Player where seeking would result in graphical glitches.
“Better Not Lack” (track 12) now appears correctly in Mixtape Player.
Temporarily disable Dark Mode in Mixtape Player by firmly pressing the app icon and choosing “Mixtape Player”.
07/08/2017 – v1 Initial release
Developers
Exploit by s1guza and tihmstar.
Other Contributors – mbazaliy, qwertyoruiop, jk9357, REALKJCMEMBER
Common Phoenix errors
- Error – http-win.cpp:159
“Peer certificate cannot be authenticated with given CA certificates SSL certificate problem: self signed certificate in certificate chain”
How to fix – Go to Impactor > Xcode > Revoke Certificates or impactor > Xcode > Delete App ID. Then try installing Phoenix3.ipa
- Error – File: installer.cpp; line: 71; what_assert’
How to fix – There are 3 options to fix this. Cydia impactor works with a paid certificate only. Get Paid Apple developer account. If not, use Xcode + iOS App Signer utility to sideload the jailbreak IPA. Otherwise use AltStore to sideload the jailbreak app.
- Error – SSL ERROR 133
“http-sox.cpp:133 An SSL error has occurred and a secure connection to the server can not be made”
How to fix – Force close Cydia Impactor, Launch iTunes and sync your device, Quit iTunes and re-open Cydia Impactor.
- HTTP-WIN.CPP:158
“Peer certificates cannot be authenticated with given CA certificates. SSL certificate problem: self signed certificate in certificate chain”
How to fix – uninstall your current Impactor version and o download the latest update of Cydia Impactor.
- Error – Asking for offsets when trying to re-jailbreak
How to Fix – offsets are broken in v1 and v2 updates. Remove the old versions. Get V3 Phoenix update.
- Error – provision.cpp:173 error
“Please sign in with an app-specific password. You can create one at appleid.apple.com.”
How to fix – just create a new Apple ID and password and try again. If not, try disabling two-factor authentication and make an attempt using your existing Apple ID password.
